
Dell Inspiron E1405 Hard Drive Replacement

What you need

  1. Dell Inspiron E1405 Hard Drive Replacement, Battery: step 1, image 1 of 1
    • Save your work, power the laptop off, and ensure that the charging cable is unplugged before removing the battery.

    • Flip the laptop over.

    • Locate the battery release switch on the bottom of the laptop.

  2. Dell Inspiron E1405 Hard Drive Replacement: step 2, image 1 of 3 Dell Inspiron E1405 Hard Drive Replacement: step 2, image 2 of 3 Dell Inspiron E1405 Hard Drive Replacement: step 2, image 3 of 3
    • Slide the battery release switch away from the lock symbol until you hear the battery click.

    • Slide the battery towards the back of the laptop until it comes free.

  3. Dell Inspiron E1405 Hard Drive Replacement, Hard Drive: step 3, image 1 of 2 Dell Inspiron E1405 Hard Drive Replacement, Hard Drive: step 3, image 2 of 2
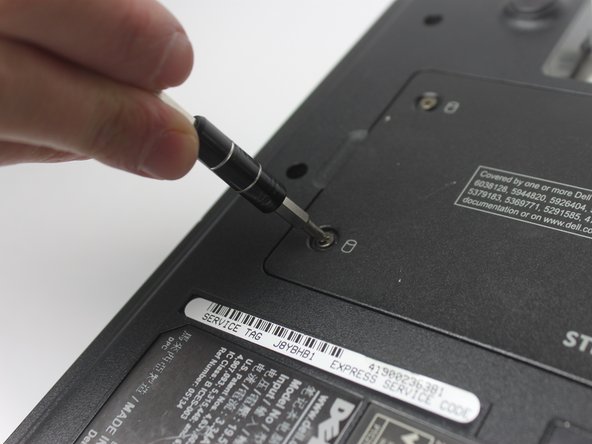
    • Locate the hard drive access door.

    • Remove the two 5.5mm screws with a #00 Phillips screwdriver. These screws are securing the hard drive access door.

  4. Dell Inspiron E1405 Hard Drive Replacement: step 4, image 1 of 2 Dell Inspiron E1405 Hard Drive Replacement: step 4, image 2 of 2
    • Using your fingers, open and remove the access door from the laptop, exposing the hard drive underneath.

Conclusion

To reassemble your device, follow these instructions in reverse order.

One other person completed this guide.

Sarah Neal Secrest

Member since: 03/20/17

597 Reputation

5 Guides authored

Team

0 Comments

Add Comment

View Statistics:

Past 24 Hours: 0

Past 7 Days: 3

Past 30 Days: 9

All Time: 1,145