Bissell Air180 Motherboard Replacement

What you need

  1. Bissell Air180 Motherboard Replacement, Air Filter: step 1, image 1 of 2 Bissell Air180 Motherboard Replacement, Air Filter: step 1, image 2 of 2
    • Squeeze the clip on the back panel of the bottom housing and pull the panel away from the housing, exposing the air filter.

  2. Bissell Air180 Motherboard Replacement: step 2, image 1 of 1
    • Grab the sides of the filter and pull it up.

  3. Bissell Air180 Motherboard Replacement: step 3, image 1 of 1
    • Pull the filter away from the bottom housing, removing it from the rest of the device.

  4. Bissell Air180 Motherboard Replacement, Power Supply: step 4, image 1 of 1
    • Remove the four 18mm Phillips #1 screws connecting the bottom housing to the rest of the device.

  5. Bissell Air180 Motherboard Replacement: step 5, image 1 of 3 Bissell Air180 Motherboard Replacement: step 5, image 2 of 3 Bissell Air180 Motherboard Replacement: step 5, image 3 of 3
    • Pull the bottom housing away from the rest of the device separating the power supply.

    • Unplug the red cord to fully disconnect the power supply from the fan and motherboard housing.

  6. Bissell Air180 Motherboard Replacement, Control Buttons: step 6, image 1 of 3 Bissell Air180 Motherboard Replacement, Control Buttons: step 6, image 2 of 3 Bissell Air180 Motherboard Replacement, Control Buttons: step 6, image 3 of 3
    • Pry off the top vent, separating it from the fan and motherboard housing.

  7. Bissell Air180 Motherboard Replacement: step 7, image 1 of 2 Bissell Air180 Motherboard Replacement: step 7, image 2 of 2
    • Pry the button control panel up and away from the rest of the device using a spudger.

  8. Bissell Air180 Motherboard Replacement: step 8, image 1 of 2 Bissell Air180 Motherboard Replacement: step 8, image 2 of 2
    • Pull the wire connecting the button controls to the fan housing to fully disconnect the button controls from the device.

  9. Bissell Air180 Motherboard Replacement, Fan: step 9, image 1 of 3 Bissell Air180 Motherboard Replacement, Fan: step 9, image 2 of 3 Bissell Air180 Motherboard Replacement, Fan: step 9, image 3 of 3
    • Flip the motherboard and fan housing upside down to find where to disconnect the fan from the rest of the device.

    • Remove the two 11 mm screws using a Phillips #1 screwdriver.

    • Detach the two wires connecting the fan to the motherboard so the fan is now loose inside the housing.

  10. Bissell Air180 Motherboard Replacement: step 10, image 1 of 2 Bissell Air180 Motherboard Replacement: step 10, image 2 of 2
    • Flip the motherboard and fan housing back over and pull the fan up separating it from the rest of the device.

  11. Bissell Air180 Motherboard Replacement, Motherboard: step 11, image 1 of 2 Bissell Air180 Motherboard Replacement, Motherboard: step 11, image 2 of 2
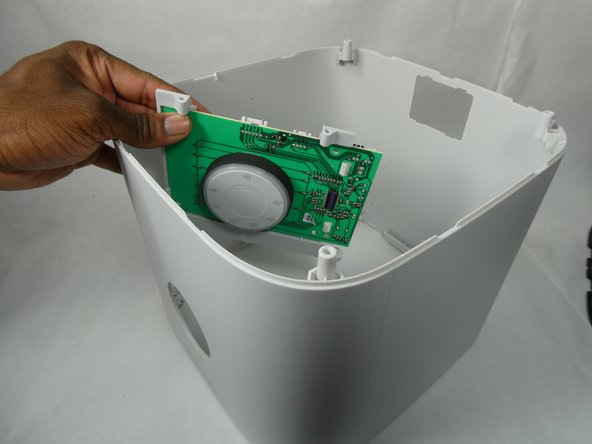
    • Apply pressure and push out the control knob to remove the motherboard from the rest of the device.

    • Removing the two 11mm Phillips #1 screws when disconnecting the fan also disconnected the motherboard from the rest of the device.

Conclusion

To reassemble your device, follow these instructions in reverse order.

Aleah Ramos

Member since: 10/26/22

533 Reputation

5 Guides authored

Team

UMass Dartmouth, Team 3-4, Botvin Fall 2022 Member of UMass Dartmouth, Team 3-4, Botvin Fall 2022

UMASSD-BOTVIN-F22S3G4

4 Members

5 Guides authored

0 Comments

Add Comment

View Statistics:

Past 24 Hours: 0

Past 7 Days: 1

Past 30 Days: 4

All Time: 87