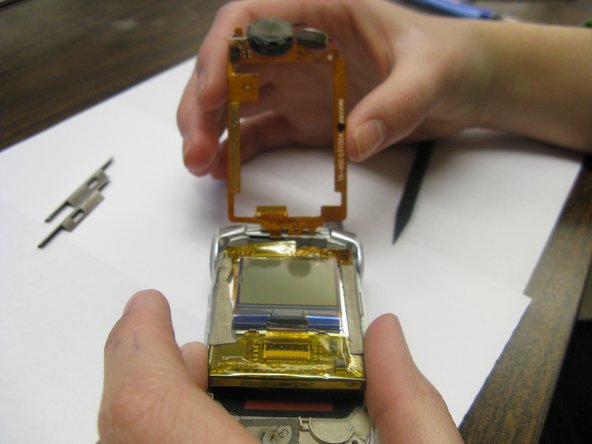
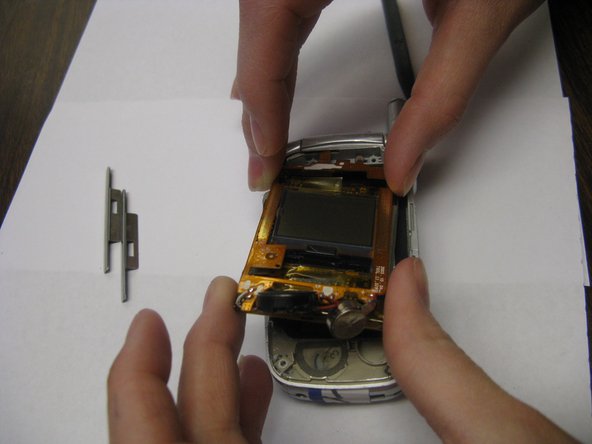
Audiovox CDM-8900 Main LCD Screen Replacement

What you need

  1. Audiovox CDM-8900 Main LCD Screen Replacement, Main LCD Screen: step 1, image 1 of 2 Audiovox CDM-8900 Main LCD Screen Replacement, Main LCD Screen: step 1, image 2 of 2
    • Remove four screw covers using the spudger.

    • Because the bottom two screw covers are attached with an adhesive, you will not be able to replace them when you reassemble the phone.

  2. Audiovox CDM-8900 Main LCD Screen Replacement: step 2, image 1 of 2 Audiovox CDM-8900 Main LCD Screen Replacement: step 2, image 2 of 2
    • Remove the four Phillips #00 screws.

    • Tweezers may be useful for removing loosened screws.

  3. Audiovox CDM-8900 Main LCD Screen Replacement: step 3, image 1 of 3 Audiovox CDM-8900 Main LCD Screen Replacement: step 3, image 2 of 3 Audiovox CDM-8900 Main LCD Screen Replacement: step 3, image 3 of 3
    • The small electronic components inside the phone are fragile; take care not to damage them when completing this step.

    • Wedge one of the plastic opening tools under the phone cover near the hinge.

    • Insert the second plastic opening tool under the phone cover and slide it around the perimeter.

    • Detach the phone cover from the phone's base.

  4. Audiovox CDM-8900 Main LCD Screen Replacement: step 4, image 1 of 3 Audiovox CDM-8900 Main LCD Screen Replacement: step 4, image 2 of 3 Audiovox CDM-8900 Main LCD Screen Replacement: step 4, image 3 of 3
    • Slide out the two metal braces located along the sides of the LCD screen.

    • Carefully peel back the tape from both sides of the copper frame.

  5. Audiovox CDM-8900 Main LCD Screen Replacement: step 5, image 1 of 2 Audiovox CDM-8900 Main LCD Screen Replacement: step 5, image 2 of 2
    • Do not detach or tear any wires when completing this step.

    • Using the spudger, carefully separate the speaker and microphone from the inside surface of the phone.

    • The smaller black disc is glued down, so you may need to use some force to detach it. Both disks will still remain attached via wires.

  6. Audiovox CDM-8900 Main LCD Screen Replacement: step 6, image 1 of 2 Audiovox CDM-8900 Main LCD Screen Replacement: step 6, image 2 of 2
    • The copper frame is attached to the phone at the hinge. Do not tear the frame.

    • Gently lift the copper frame surrounding the LCD screen.

  7. Audiovox CDM-8900 Main LCD Screen Replacement: step 7, image 1 of 2 Audiovox CDM-8900 Main LCD Screen Replacement: step 7, image 2 of 2
    • With the copper screen lifted up, gently pull out the ribbon connector and lift out the LCD screen.

Conclusion

To reassemble your device, follow these instructions in reverse order.

Aaron Shaw

Member since: 04/15/10

159 Reputation

6 Guides authored

Team

Cal Poly, Team 28-31, Regan Spring 2010 Member of Cal Poly, Team 28-31, Regan Spring 2010

CPSU-REGAN-S10S28G31

4 Members

12 Guides authored

0 Comments

Add Comment

View Statistics:

Past 24 Hours: 0

Past 7 Days: 0

Past 30 Days: 3

All Time: 4,107